Since the development of the fiber laser marking machine industry, laser marking technology has become increasingly mature and organically combined with computer technology. Users only need to program on the computer to achieve laser marking output. However, how should we adjust the parameter settings for the initial debugging of the fiber laser marking machine? Today we will take a look at how to adjust the fiber laser marking machine.
When it comes to the adjustment of fiber laser marking machine, the concept of outsiders is vague. This requires us to have a deep understanding of the main structure of fiber laser marking machine and have an understanding of the structure of fiber laser marking machine. After that, there is a better way to adjust, so first of all, let’s take a look at the structure of the fiber laser marking machine.
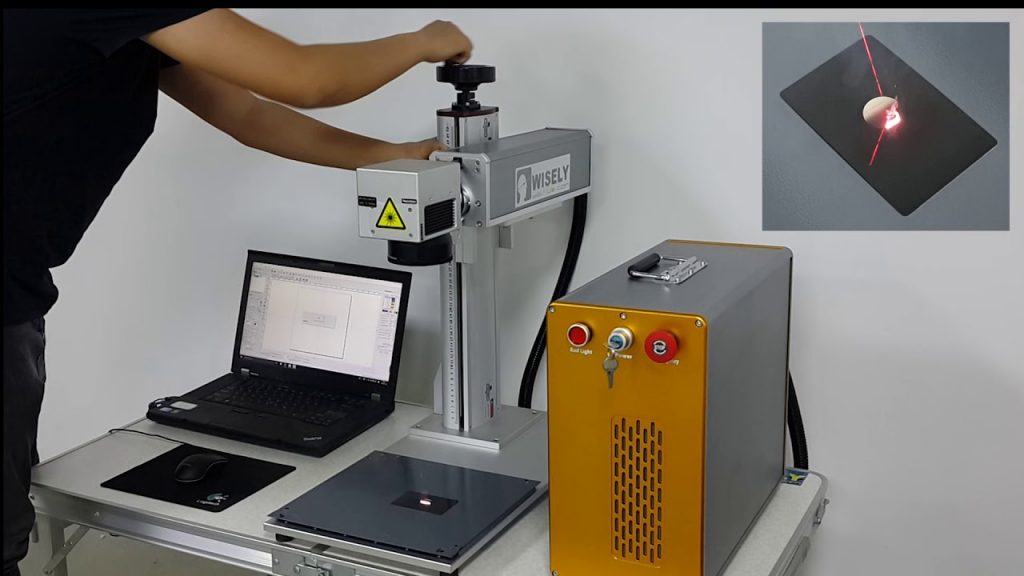
The structure of fiber laser marking machine includes laser, power supply, marking machine cabinet, galvanometer, field lens, beam combiner, marking card, red light indicator, marking card power supply, power filter and so on.
Laser:
1. Good beam quality of laser output, including mode and mode stability;
2. Whether the output power of the laser is large enough and whether the energy is stable (usually 2% stability is required, and 1% is required in some occasions, so that the ideal effect can be processed);
3. The laser should have high reliability, and should be able to work continuously in harsh industrial processing environments;
4. The laser itself should have good maintainability, fault diagnosis and interlocking functions, and the downtime should be short;
5. The operation is simple and convenient, and the control keys have clear functions, which can reject illegal operations and protect the laser from damage.
Power supply: It is a component that powers the fiber laser.
Marking machine cabinet: If a marking machine is regarded as a computer, the cabinet is equivalent to the shell of the computer. There are desktop computer shells and laptop shells, then the marking machine has desktop marking machine cabinets and portable marking Machine cabinet, handheld laser marking machine cabinet, various styles.
Galvanometer: The galvanometer of the optical fiber marking machine is generally a digital galvanometer with a 10mm spot. Of course, some people use analog galvanometers. Now most of the optical fiber marking machines use digital galvanometers. The digital galvanometer is actually not much different from the analog galvanometer. It is an analog galvanometer plus a DA, so that the signal is transmitted in the form of a digital signal during the transmission process, which reduces the possible interference during the transmission process.
field lens: also called plan focusing lens, scanning lens, F-θ lens. It is mainly used to focus the light from the galvanometer on a plane. At the time of purchase, you should pay attention to the marking range, and determine it according to your own needs. Don’t blindly ask for it. The wavelength of the optical fiber marking machine and the semiconductor marking machine are both 1064nm, and the field lenses of the two are generally universal.
Beam combiner: Mainly used in systems that use laser diodes for calibration. YAG beam combiner is designed to transmit a 1064nm laser beam when incident at 45 degrees, and align it with a 650nm laser beam that can be seen by the naked eye at 90 degrees. .
Marking card: also called laser control card, laser marking card.
Red light indicator: also called red light pen, used to indicate the light path, because the 1064nm laser is invisible, while the 650nm light of the red indicator is visible. The 650nm light and the 1064nm light are combined through the beam combiner. It overlaps, so where the 650nm light is pointing, the 1064nm light is where it is, so as to achieve the function of indicating the light path. The red light pen is installed in the red light beam combining frame.
Marking card power supply: power supply for laser marking card.
Power supply filter: The power supply filter can play an anti-interference effect and reduce the failure of the marking machine such as crashes, random beating, intermittent filling, filling and missing filling.
The above is the structure of the fiber laser marking machine. I believe we have a general understanding after reading it. Then after we understand the structure, it is easier to deal with the common problems of the fiber laser marking machine. Let’s continue. Take a look at the common problem adjustment of laser marking machine.
1. Open the laser cover and adjust the red light indicator first. When adjusting the red light, make sure that the red light hits the center of the hole in the front plate. The method of conditioning is: first put the red light indicator close to the front panel, adjust the up and down and left and right knobs on the device frame, so that the red light hits the center of the round hole of the front panel; then, when the red light is close to the rear panel, the conditioning device frame Pitch and tilt buttons on the upper and back. Repeat the above operation until the red light is collimated.
2. Adjust the output mirror, semiconductor module, and total mirror to make their centers coincide with the red light.
3. Turn on according to the power-on steps, turn off the Q drive power, and make the laser in the light-emitting state.
4. Place the fluorescence conversion film on the front end of the output mirror and increase the current of the laser power supply until the laser output is observed.
5. Adjust the output mirror knob to make the laser output spot reach the best (circular, average).
6. During the conditioning process, if the laser is too strong, the laser power supply current should be appropriately reduced to avoid damage to the fluorescent conversion film.
7. Remove the beam expander and see if your adjusted light spot passes through the middle of the output hole of the front panel. If not, use the upper and lower buttons of the total mirror and the two buttons of the output mirror to stop the adjustment. Keep in mind that the buttons of the two frames are up and down. For example: your current laser is down to right, then you should first use the upper button of the total mirror and the output mirror to twist the laser to the center of the front plate hole in the same direction, then the next step is to twist the total mirror The lower buttons of the frame and the output frame adjust the left and right center of the light spot so that the laser will not be adjusted.
8. After confirming the center, confirm whether the light spot can reach the best.
9. Install the beam expander and let the light spot pass through the center again.
Seeing this, I believe we all have a basic understanding of how to solve the common problems of fiber laser marking machine adjustment, but the editor will also give you a focus on the optical path adjustment of fiber laser marking machine, because optical path adjustment is very important Yes, if the adjustment is not in place, the printed effect is very poor, so how do you do it?
Optical path adjustment of fiber laser marking machine:
1. Red light collimator and adjustment frame: The red light collimation adjustment frame has four knobs, which are vertical, horizontal, left and right, and up and down fine adjustments. The left and right coarse adjustments are adjusted by two M6 screws.
2. Total reflection lens and adjustment frame: The two knobs are adjusted vertically and horizontally, and left and right are realized by moving the frame. The difference between a half mirror and a total reflection mirror is that the color of the half mirror is slightly darker. The color is slightly lighter.
3. Q switch and adjusting frame.
4. The structure of the laser includes crystal, krypton lamp, metal cavity, Q-switch water inlet, water return, laser water inlet, and water outlet.
5. The height of the laser is realized by adjusting the six screws at both ends of the metal cavity, and the left and right sides are adjusted by moving the bottom plate.
6. or through the adjustment of the semi-reflective lens and the adjustment frame.
In short, before the fiber laser marking machine equipment leaves the factory, the laser marking machine manufacturer will basically adjust to the best condition according to the marking requirements provided by the customer in the early stage. Under normal circumstances, no further adjustment is required. If the laser’s light output effect becomes poor after long-term use, vibration, production needs, human factors, etc., or the laser needs to be adjusted due to marking requests, the above steps are required to adjust.
The above is the whole content of how to adjust the fiber laser marking machine. I hope it will help you. For more information on how to use the fiber laser marking machine, please continue to pay attention to us.