The laser engraving machine needs to set the software before engraving, so if you want to set the software, I will explain it in detail today.
One, coreDRAW9 as example steps:
1. Contour line—-closed curve
Method 1:
After placing the “rectangle tool” or “ellipse tool” or “upper tool” in the toolbox, insert the left mouse button in the drawing area to align, and draw the corresponding outline.
Method 2:
⑴ “File” menu / input / select JPG, GIF, BMP, WMF and other formats of picture files / click the “input” button.
⑵ Position the picture in the appropriate position of the drawing area and adjust the picture size. Anywhere outside the picture area, cancel the picture placement state.
⑶The black triangle at the bottom right of the fourth icon in the axial toolbox, select the “Bez curve tool” to draw a multi-point curve on the outer boundary, and finally the curve is closed. (Note: Don’t have too many fixed points on the curve)
⑷Move the mouse to the line segment to be adjusted in the pointer toolbox “Shaping Tool”, right click the mouse/shortcut menu/to curve/hold down the left mouse button to adjust the line.
(Note: When the curve is not easy to adjust, move the mouse to the line segment to be adjusted/right-click the mouse/shortcut menu/add, and then adjust the curve after adding a fixed point.)
2. Hole line
After aligning the “ellipse tool” in the pointer toolbox, place the hole to be punched in the figure, press and hold the left mouse button to point, and draw the hole line. (Note: the hole line cannot be too close to the contour line)< / p>
3, text
After placing the “text tool” in the calibration toolbox, you need to add text position controls in the diagram, enter text content, and adjust the font and size.
4. Other lines in the outline
In the toolbox
“Hand-drawn tool” —- draw a single line
“Bez curve tool” —- draw a closed curve
5. Set the line color
Set the “dropper tool” in the pointer toolbox / insert the “color docker” / place the line to change color / select the color / set the “frame” button.
6. Delete the background image
Preset “Pick Tool”/Select Picture/Cut
7. Save format (PLT format file)
Pointer “File” menu item/output/determine save location, file name, file type (PLT)/indicate “output” button, save mark.
Second, laser cutting operation steps
1. Start the LaserCa laser engraving machine software and enter the working interface
2. “File” menu/import/select wizard file (plt format file)/press the “open” button
3. Position the logo in the appropriate position of the black cutting area
4. Adjust the size, cutting size and starting cutting position
Toolbar:
X, Y――start cutting position, it is recommended to set it to zero
,-the width and height of the actual cutting size
5. The entire vector, “Edit” menu/dissolve all
6. In the toolbox, replace “define quadrilateral engraving area” or “multiple engraving areas” with vertices in the toolbox, and enclose the Chinese characters in the pattern.
※Calibrate the whole integer/”Edit” menu/batch copy/set copy number and spacing
7. Set the two-color plate engraving parameters
“Settings” menu/Engraving settings/Replace “Ingraving”/”Engraving speed” 20000mm/min in the basic settings, “Engraving level” 50%/Do not insert “outer frame cutting” in the advanced settings / click ” Confirm button.
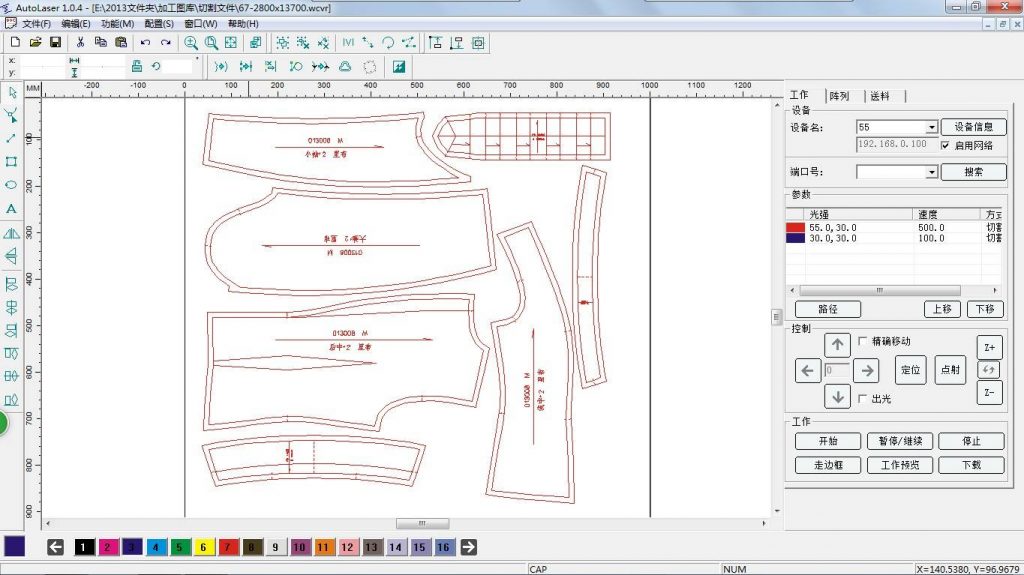
8. Set two-color plate cutting parameters
“Settings” menu item/cutting settings/order a certain color bar/basic settings of “cutting speed” and “cutting energy level” parameters/setting “OK” button.
Note:
A, do not cut through the line—-“cutting speed” 20000mm/min, “cutting energy level” 50%
Cut through lines——“cutting speed” 500mm/min, “cutting energy level” 100%
B, cutting speed size, the smaller the cutting force.
9, “Run” menu / run (transmit the file to the engraving machine)
10. Place a material board on the operating surface of the engraving machine.
11. Adjust the position of the laser head
12. Click the “Lighting Settings” button to allow lighting
13, Engraving machine panel/”file” button/expected file/”start” button
14. When the cutting is over, press the “return” button
15. Press the “light setting” button again to cancel the light output
16. Take out the work on the operating surface of the engraving machine
For different engraving patterns, the software has different settings. You can refer to the instructions and combine your own experience to make reasonable settings.