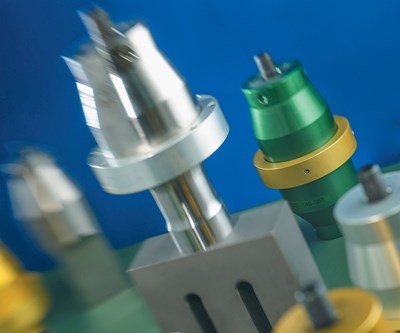
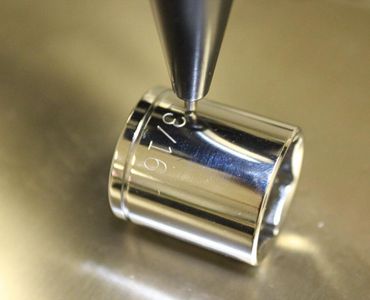
The pneumatic marking machine uses a computer to control the printing needle, and through the action of compressed air, the printing needle makes a high-frequency impact movement to print a mark on the object. Such as car engine code, production date, bicycle, electric car, motorcycle frame number, car sign, marking of various mechanical parts, etc. are the more common results printed by pneumatic marking machines. The pneumatic marking machines of many manufacturers always have some faults during the use process. If you want to solve these faults, you need to see what causes them, and then look for solutions. Let me explain the common faults and troubleshooting methods of pneumatic marking machines.
- The depth of marking writing becomes shallower
(1) The marking needle is worn too much and should be replaced;
(2) Adjust the distance between the needle and the marking workpiece;
(3) Check whether the air pressure is reduced, and if there is oil or water in the air, let it go.
- The marking head does not eject the needle or the needle is abnormal:
(1) Check whether the pressure of the pressure reducing valve is normal (normal value is 2-4 atmospheres);
(2) Check whether the air circuit is well connected, whether there is air leakage at the needle sleeve connection, and whether the tracheal joint is plugged in;
(3) Use manual test to see if the steel needle vibration is working, and see if the needle valve air vibration is normal;
(4) Check whether the frequency of the solenoid valve and the potentiometer in the circuit board are adjusted properly. W1 frequency modulation, W2 adjustment, after adjustment, measure the voltage between “24” and MAC in the upper right corner of the control panel to be less than 9.6V.
- The marking handwriting is deformed and the strokes are misplaced:
(1) Whether the copper sleeve contacting the needle at the lower end of the marking head cylinder is worn too much, otherwise it should be replaced;
(2) When energized and not working, hold the marking head cylinder head and gently shake it in the X direction and Y direction to see if there is any looseness in each direction. If there is a gap, check whether the timing belt is too loose and whether the timing belt pressure plate is loose. , Whether there is any looseness between the synchronous pulley and the motor shaft, reconnect or tighten;
(3) Check for impurities on the slide bar of the two-dimensional workbench;
(4) Check whether the electrical connection is loose;
- The marking head on the two-dimensional workbench is not in place when it is working, and it makes an impact sound when returning to zero:
(1) Check whether the in-position switch in this direction is damaged or disconnected;
(2) Whether the control board is faulty, or it should be replaced.
- Only one vertical line or one horizontal line appears when marking:
(1) Check whether the motor connection in this direction is normal;
(2) Check whether the motor winding is broken, if it is broken, replace the motor;
(3) Whether the drive in this direction is damaged.
- Marking handwriting is too thin:
(1) The pen down speed is too fast, appropriately reduce the pen down speed;
(2) The needle vibration frequency is too low. (Generally, it has been adjusted before leaving the factory)
- The last few digits of the marking handwriting overlap:
If the marking range is exceeded, the marking starting point of the corresponding axis should be adjusted.
- No signal indication of total power supply, computer and drive power supply:
(1) The main power switch is broken or desoldering;
(2) The fuse switch of the power socket on the control box, replace the fuse.
- The control system is abnormal:
(1) Check whether the 5V and 24V DC output of the control panel is normal. If it is damaged, the control board needs to be replaced;
(2) If the control board has no input, check whether the transformer is normal.
- After pressing the marking instruction, the marking machine cannot work and the software system reports “Y direction in-position error”:
(1) Check whether the “manual/automatic” switch is in the automatic state;
(2) If it enters the automatic state, there should be no action in the first three switch systems, otherwise check later;
(3) Check whether the connecting plug of the manual/automatic switch to the circuit board is properly inserted, and whether the wire is well pressed;
(4) Check whether the switch is disconnected;
(5) Short-circuit the two pins of the switch and see if it is normal. If it is normal, the switch will be broken;
(6) If it is still not normal, replace the circuit board.
- The marking machine does not work or does not work properly:
(1) Check whether the signal line and control line of the marking machine are well connected;
(2) Manual test to see if there is any manual action. If there is manual action, it should be caused by the failure of the computer and the connection line, and the socket of the relevant control board, otherwise it is the failure of the control box.
In fact, almost all the problems of pneumatic marking machines and the reasons behind the failures may be very simple. You only need to check carefully, and after finding the reasons, it may not take much effort to solve them. However, you must cut off all relevant power supplies during the overhaul process, and you can operate only when the safety of the overhaul personnel is ensured!